So in my first post on the topic of integrating the Experience API and Captivate, I showed you how to take a couple user inputs and translate that into a simple statement that would be sent to an LRS when the user clicks a button.
Sending a statement from a Captivate project is cool, but it’s only half the usefulness that xAPI enables. The ability to retrieve statements and report on it without an LMS is where you really get in touch with the power of what this standard can do. In this tutorial, I’ll be creating a slightly more complex set of statements, searching for those statements, manipulating them, and displaying them within Captivate.
For this exercise, I want the user to input a number that will serve as their “score.” I want the statement to say they completed the activity and I want that statement to include the score. Then I want the Captivate project to grab all other statements generated from that and display the top 10 scores.
And just for funsies, I’ll be publishing it as an HTML5 project instead of the SWF output we had last time. This will actually give us a handy advantage when it comes to creating the leaderboard, but in all other respects it’s pretty similar.
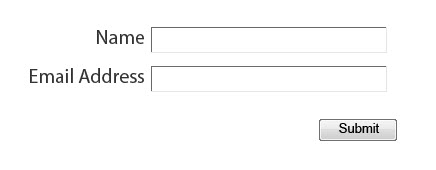
So just like in Part 1, I’m going to start with a Captivate file that takes in the user’s name and email address. Just like before, I’m going to change the assigned variables (using the Properties pane) to the more descriptive names user_name and user_email. On success, the action is set to Go to next slide.

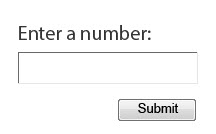
For the second slide, I’m going to add another text entry box so the user can enter a number. Just like before, I’ll change the assigned variable to the more descriptive name user_score.
[I realize this is kind of a weird activity, but it’s just designed to simulate playing a game or doing some scored activity in Captivate and passing along to the LRS as a score. In your own design, you’ll just save that score to a variable and pass it along without this user input aspect.]
For the associated action, select the text entry box and change the On Success action to Execute JavaScript. Click the Script_Window button and add the following code to the popup window.
var userName = window.cpAPIInterface.getVariableValue("user_name");
var userEmail = 'mailto:' + window.cpAPIInterface.getVariableValue("user_email");

stmt.actor = new ADL.XAPIStatement.Agent(userEmail, userName);

var userScore = window.cpAPIInterface.getVariableValue("user_score");

stmt.result = {
 'score': {
   'raw': userScore
 },
 'completion': true
};

var resp_obj = ADL.XAPIWrapper.sendStatement(stmt);
So let’s unpack this a little. You can read the explanation for the first half of this in Part 1 – I’m just saving the userName and userEmail from Captivate’s interface and adding them to the actor portion of our stmt (which is defined in our external js file). I’m doing the same thing with the score entered in the second slide, adding it to userScore.
var userScore = window.cpAPIInterface.getVariableValue("user_score");
The new bit here is result. This changes up the design of our xAPI statement a bit, which in Part 1 was just limited to the basics – actor, verb, object. Result is a new property that we can add to our statement to give it more meaning. There’s a bit more complexity to it, though, since the result property has several sub-properties like score, completion, and duration. Adding even more complexity, score has additional sub-properties like scaled, raw, min, and max.
Just like layers of an onion, an xAPI statement can be as superficial or as deep as you want it to go. As long as you’ve got actor, verb, and object, all of the rest is optional (for the most part), so I pick and choose based on what kind of performance or experience I’m describing in the statement.
Confused? It may help to visualize all the available properties in this diagram Jason Haag shared on Twitter.
Diagram of #xAPI Statement Objects & Properties. Send feedback. Is it helpful? What’s missing? https://t.co/k5H1eO8PCd #learninganalytics
— Jason Haag (@mobilejson) October 21, 2015
If you really want to get into the ins and outs of the result property, I highly recommend this article by Brian Miller.
Getting back to our code, I’m adding userScore to the raw sub-property of score, since it’s… well… a raw score. I’m also setting the completion property to true, since it does in fact complete this activity.
Our helpful xAPI Wrapper helper library only goes so far in simplifying the creation of our statement, so if we want to really dig in to certain properties, we’ve got to actually use the correct JSON format to define this part of our statement. It’s simple enough, as long as you use the xAPI specification as your guide.
stmt.result = {
 'score': {
   'raw': userScore
 },
 'completion': true
};
The final line of code just sends our statement.
var resp_obj = ADL.XAPIWrapper.sendStatement(stmt);
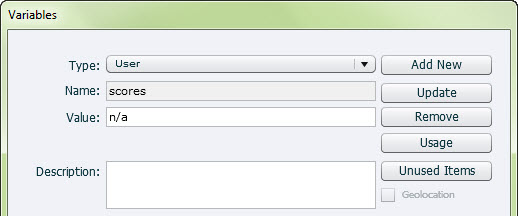
With our activity done, let’s work on displaying the scores. I’m going to open up Project > Variables and create a new variable called scores. This will be where we send our score data once we’ve determined what to display. I’ve also added a value of “n/a” just so I’ll know if it’s not working right.
Next, let’s add a new slide and insert a text caption. Now all you have to do to insert the variable into this text caption is go to your properties menu and select the [X] button in the Character section.

This will bring up a popup window that lets you select our scores variable from a dropdown menu. By default, the Maximum length is set to 50, but I’m going to bump that up some more just in case. It’s also worth spending a moment to make sure your text caption box (on the slide itself) is big enough to accommodate your leaderboard at this point.

Now comes the fun part: select the slide and select Actions from the properties menu. On Enter, we’re going to Execute Javascript. Click the Script_Window button and paste the following code:
var search = ADL.XAPIWrapper.searchParams();

search['activity'] = "https://willchinda.com/blog/2015/12/06/xapi-captivate-part-2/";
var res = ADL.XAPIWrapper.getStatements(search);

var stmts = res.statements;

var topscores = stmts.sort(function(a, b) { return a.result.score.raw < b.result.score.raw ? 1 : -1; }).slice(0, 10);

var leaderboard = "";

for (var i = 0; i < topscores.length; i++) {

  var cleanName = JSON.stringify(topscores[i].actor.name);
  var nameLength = cleanName.length;
  cleanName = cleanName.slice(1,nameLength-1);

  leaderboard += cleanName + " scored " + JSON.stringify(topscores[i].result.score.raw) + "<br />";
}

window.cpAPIInterface.setVariableValue("scores",leaderboard);
Let’s unpack this and explain what’s going on in each section.
For starters, we’re going to use xAPIWrapper’s search functionality, by creating a variable called search that will store our parameters. We’re then going to assign our activity ID as a search parameter under ‘activity.’ Then, we perform our search and save our results to the variable stmts.
var search = ADL.XAPIWrapper.searchParams();

search['activity'] = "https://willchinda.com/blog/2015/11/30/xapi-captivate-part-2/";
var res = ADL.XAPIWrapper.getStatements(search);

var stmts = res.statements;
Next, we have to sort our statements in descending order by raw score. Then, we use the slice command to only keep the top 10 (if you want to show the top 5 or 20 or 78, just change that second number) and save it to a variable called topscores.
var topscores = stmts.sort(function(a, b) { return a.result.score.raw < b.result.score.raw ? 1 : -1; }).slice(0, 10);
Now comes the funky stuff. I’m going to start off by initializing a variable leaderboard and assigning it the value of “” because I want to add strings to it.
Then, I’m going to create a loop that will run as many times as there are elements in topscores (in this case, the loop will run up to 10 times). Every time it runs, it’s going to pull out the actor’s name from topscores and remove the quotes around it (it finds how many characters are in the name, saving it to namelength, then uses that to determine how many characters in to chop off). I’m not sure why the actor’s name always comes back with quotes around it, but for the sake of prettiness, I want to chop them off.
Finally, it takes the variable leaderboard that we initialized before the loop and adds the actor’s name, the word “scored” and their raw score. The cherry on top of all this is "<br />"which is a basic HTML tag that adds a linebreak after every line. Unfortunately, if you tried to publish this as a SWF, you’ll just end up seeing the tag instead of an actual line break! As I mentioned at the top, this is the advantage we have in publishing to HTML5.
var leaderboard = "";

for (var i = 0; i < topscores.length; i++) {

 var cleanName = JSON.stringify(topscores[i].actor.name);
 var nameLength = cleanName.length;
 cleanName = cleanName.slice(1,nameLength-1);

 leaderboard += cleanName + " scored " + JSON.stringify(topscores[i].result.score.raw) + "<br />";
}
Finally, we’ll put the leaderboard variable into our scores variable so it shows up in our text caption.
window.cpAPIInterface.setVariableValue("scores",leaderboard);
And that’s it for our Captivate project! Let’s publish this and set up our LRS endpoint and finish crafting the rest of our statement.
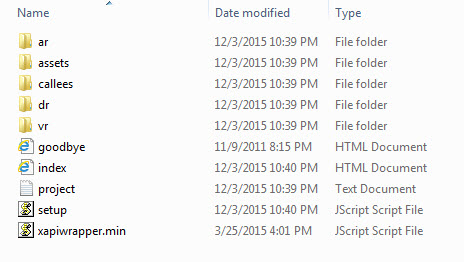
Just like before, I’m going to add a copy of xapiwrapper.js to the published folder and create a new file called setup.js. With all the files in place, the folder should look something like this:
[Note that unlike with SWF publishing, republishing an HTML5 project will replace all the files in your output folder and delete additions you might have made prior. Make sure you have copies of whatever you’re copying into here!]
Within setup.js, I’ll setup my LRS endpoint (I’ll be using the ADL test LRS again) and define the verb and object properties of the statement I’m sending. As mentioned in my requirements, I’m setting the verb to completed and again using the URL for this blog post as the object ID.
function setupConfig() {
 var endpoint = 'https://lrs.adlnet.gov/xapi/';
 var user = 'xapi-tools';
 var password = 'xapi-tools';

 var conf = {
   "endpoint" : endpoint,
   "auth" : "Basic " + toBase64(user + ":" + password),
 };

 ADL.XAPIWrapper.changeConfig(conf);
}

// Configure xAPIWrapper and save credentials
setupConfig();

// Create a statement
var stmt = new ADL.XAPIStatement();

// Add 'completed Captivate leaderboard tutorial' to the statement
stmt.verb = new ADL.XAPIStatement.Verb('http://adlnet.gov/expapi/verbs/completed', 'completed');
stmt.object = new ADL.XAPIStatement.Activity('https://willchinda.com/blog/2015/12/06/xapi-captivate-part-2/', 'Captivate leaderboard tutorial');
For the finishing touch, all we need to do is add references to setup.js and xapiwrapper.js in our index file.
<script src="xapiwrapper.min.js" type="text/javascript"></script>
<script src="setup.js" type="text/javascript"></script>
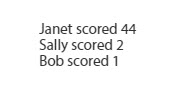
And that’s it! If we run through the project a couple times with some random data, the leaderboard should look something like this:
Just like before, I’ve posted a working version on my site here and you can download all of the files on github here.
Being able to read as well as write to an LRS from Captivate really opens up some possibilities, particularly when it comes to personalization and branching scenarios.
Thanks for the posts about this.
As you know, Captivate will create a limited set of xAPI statements for you if you publish as xAPI.
My question: how do I have the out-of-the-box statements from a Captivate-published-as-xAPI project sent to a LRS WITHOUT hosting the projekt on a LRS-compatible host?
Could you write about that?
Thank you!
AFAIK, it’s not currently supported by Captivate “out of the box” – hence all the hacks. It’s been a while since I’ve played around with this, so I can’t tell you for certain. Sean Putman has written about it here – http://xapiquarterly.com/2015/09/adobe-captivate-8-0-and-9-0-best-practices-for-xapi/
Hi Will,
is it possible that your online demo stopped working? I checked it out a week ago and it worked finde and now it doesn’t work anymore.
Hi Max,
Since it’s using ADL’s public demo LRS, it’s possible it could’ve gone offline for a bit. It seems to be working now.